

How To Use A Mask On A Video In Photoshop
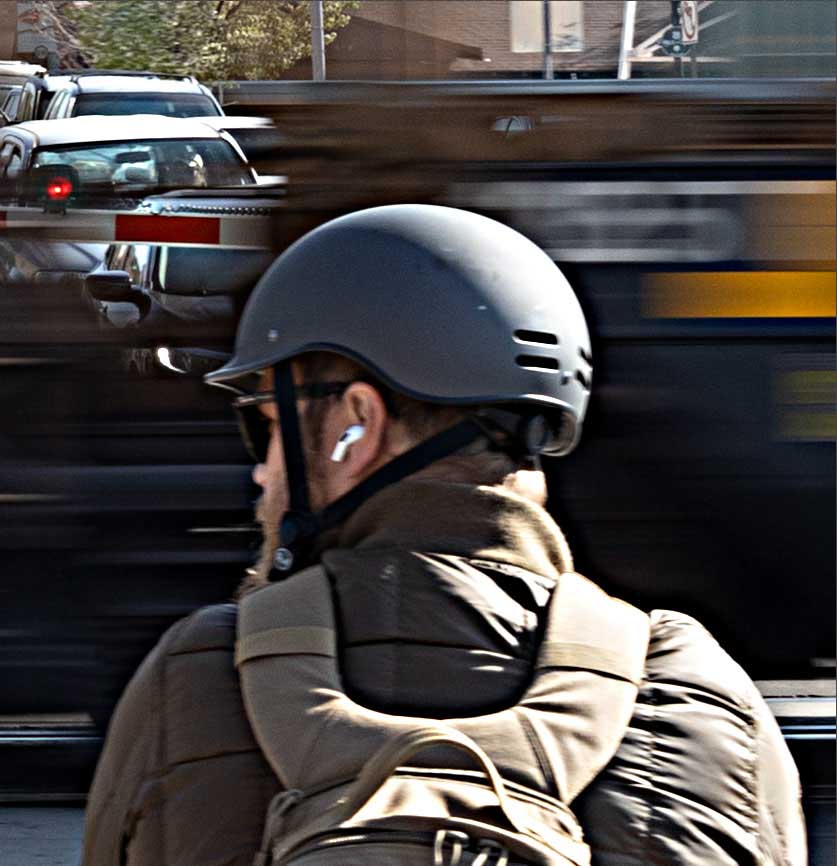
Sharpening your photos in mail-processing is a great way to enhance details or amend the quality of an paradigm before printing. In Photoshop, at that place are a number of ways to sharpen your photos that evidence more versatile than your standard sharpening slider establish in most photo editing programs. One of the best means to sharpen your photos in Photoshop is with the help of an Unsharp Mask.
To acuminate an image in Photoshop, correct-click on your paradigm layer and cull "Convert To Smart Object." Now go to Filter > Sharpen > Unsharp Mask. Prepare the Amount to adapt your image, then gear up the Radius betwixt iii-10 and the Threshold betwixt 0-2. Now click OK to utilize the sharpening adjustment.
You can also use this effect to photos that come out slightly blurry, if the autofocus on the camera pointed to the incorrect surface area, or if your manual focusing was slightly off.
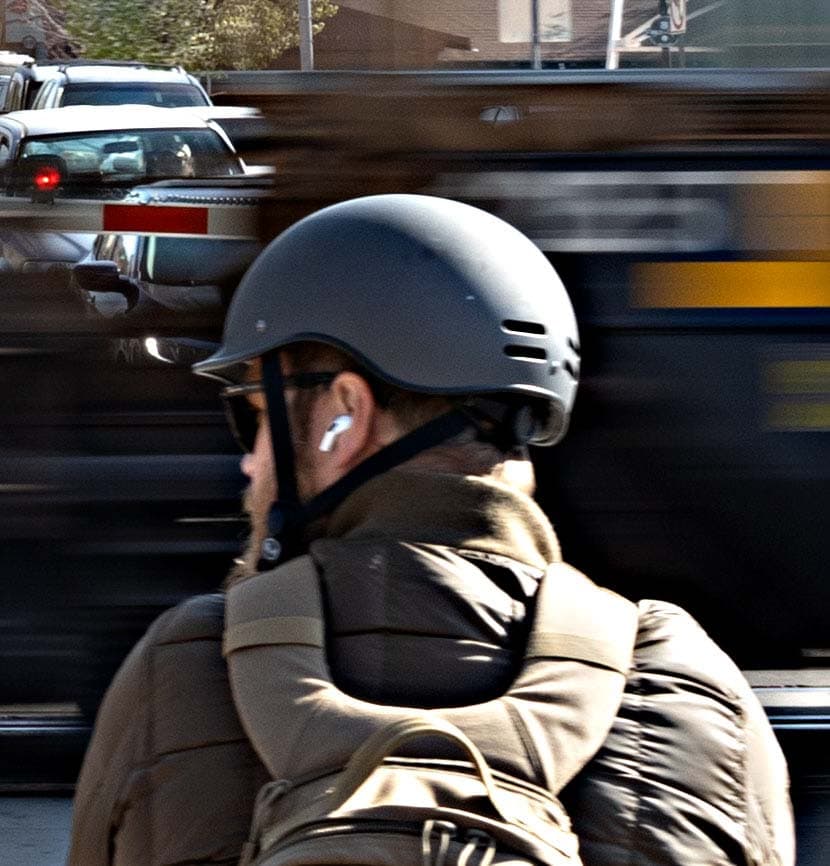
It's of import to note that sharpening an image will only enhance the details in the photo and is not a method of creating new details. This method will piece of work by sharpening the in-focus areas of an prototype and may slightly improve blurred or out-of-focus areas.
4 Ways To Sharpen An Prototype In Photoshop
These methods sharpen an prototype and increase the edge contrast to make your image details appear sharper. Since Photoshop can't add details that the photographic camera didn't capture, this is the most effective style of making an image appear more in focus and less blurry.
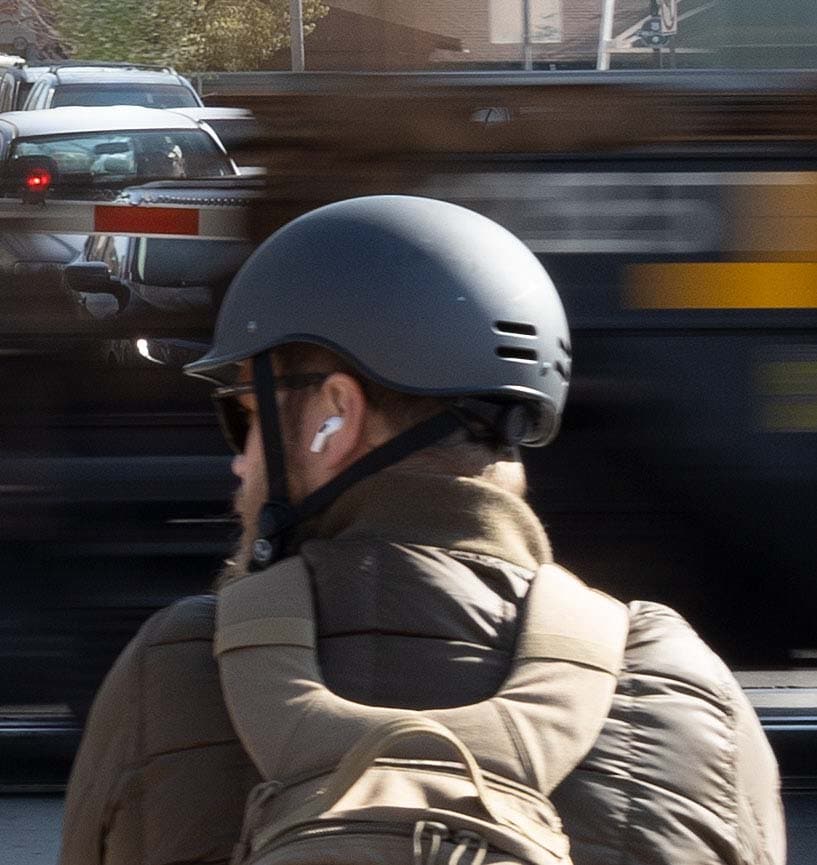
Use 1 of the methods below that work all-time on your paradigm, and be mindful that over-sharpening an image will create unwanted halo effects or grain within the image.
1. Using An Unsharp Mask
The Unsharp Mask uses a mix of manual adjustment and Photoshop's AI algorithms to create a sharper image. You can adjust the sliders to make the correct corporeality of sharpening for your photograph.
To use the Unsharp Mask, open your image in Photoshop. You tin indistinguishable your background layer if you will be adding other edits to the image by pressing Command + J (Win) or Command + J (Mac). Withal, we will create a smart filter that allows you to edit or delete the Unsharp Mask at any stage in this method.
Notation: Photoshop will only acuminate one layer at a time, and so if you have multiple edits and want to apply the effect to all the layers, you volition need to merge the layers before you sharpen the prototype.
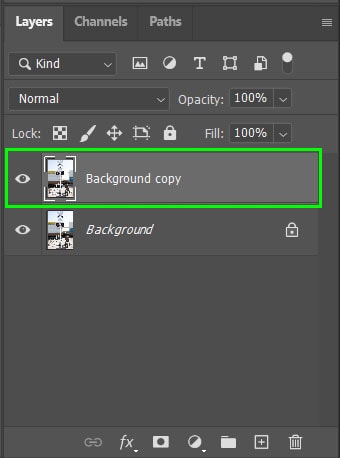
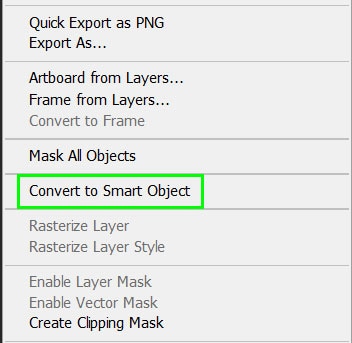
Correct-click (Win) or command-click (Mac) on the layer yous are working on, and select Catechumen to Smart Object.
An icon appears in the corner of the paradigm's thumbnail, indicating that the layer is now a Smart Object and no longer a Rasterized layer.

Now to better run across the sharpening consequence on your image, zoom into the photo. Yous can zoom by navigating to View > Zoom in, or press Control + + (Win) or Control + + (Mac).

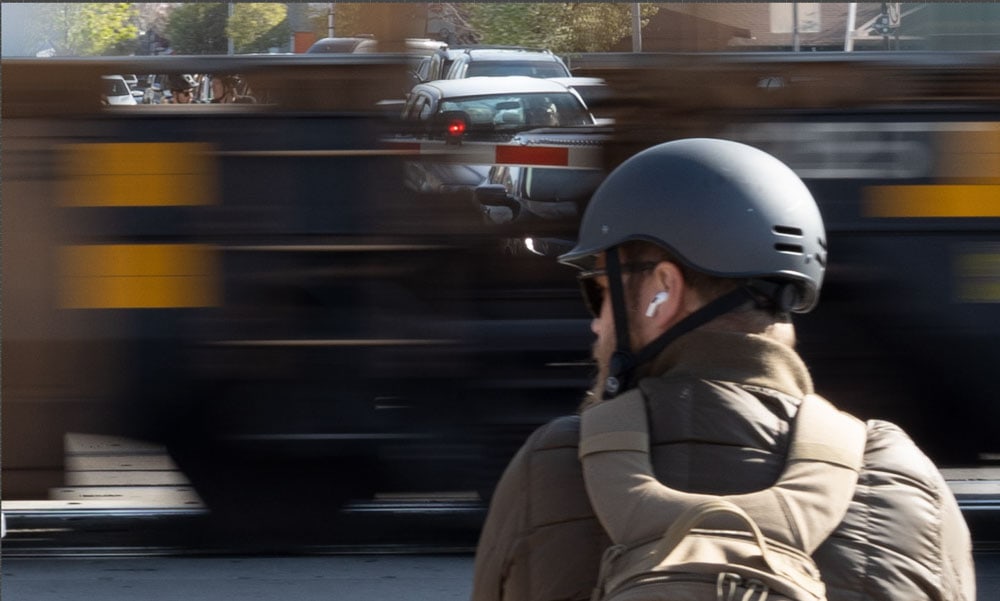
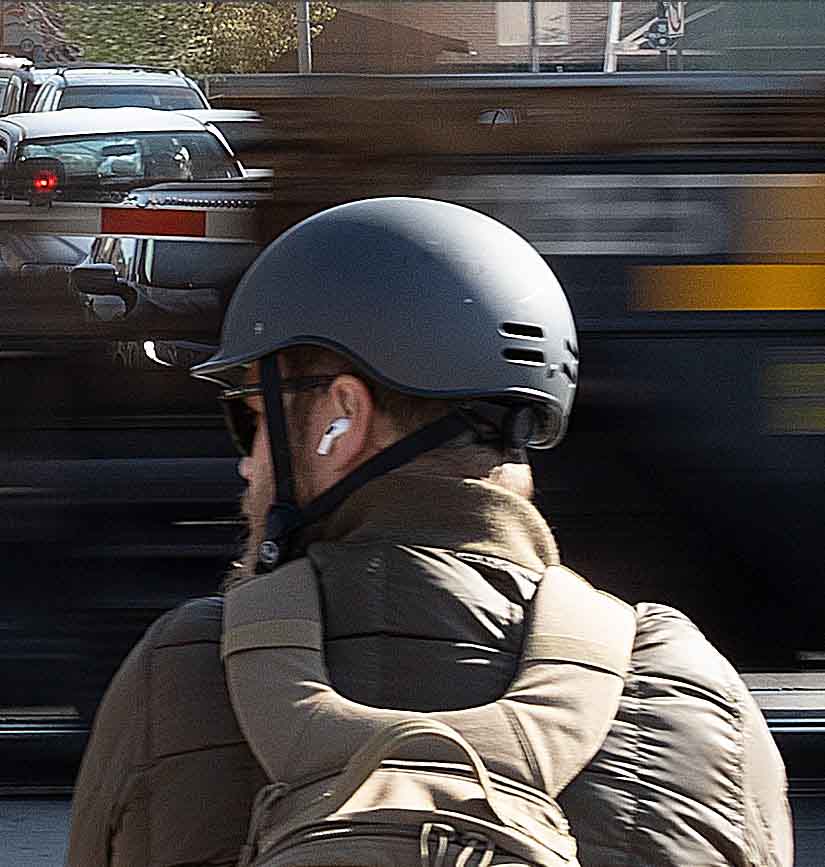
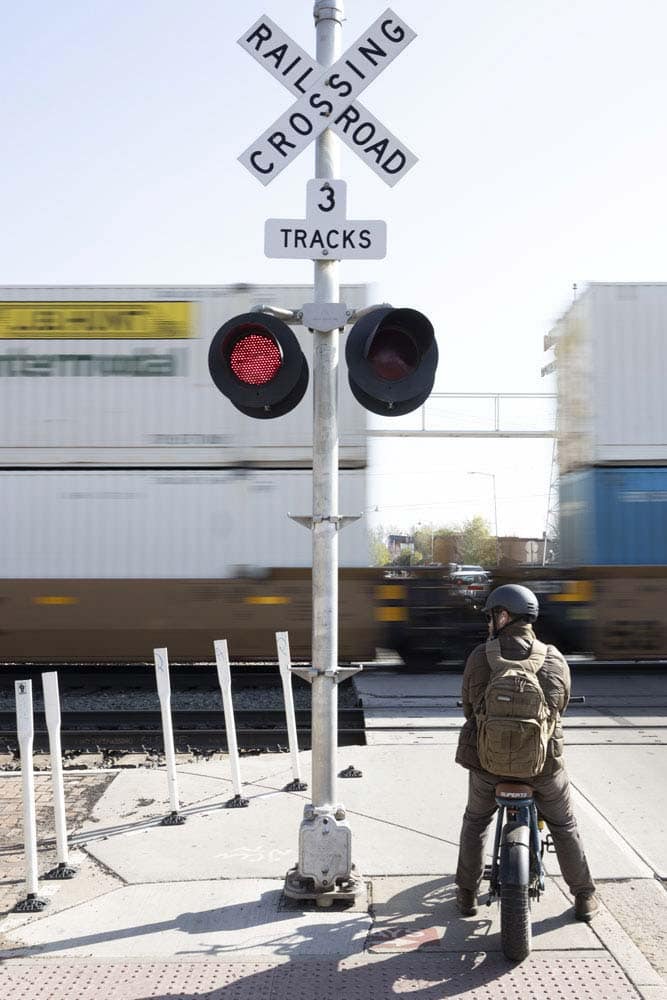
You will at present have a close-up of your image in the workspace. Make sure you move the prototype around so you have a spot where you will be able to see the sharpening effect, such as on the subject of the picture. You tin motion the image by holding the Spacebar while dragging the image around.
Now to employ the Unsharp Mask, navigate to Filter > Sharpen > Unsharp Mask.
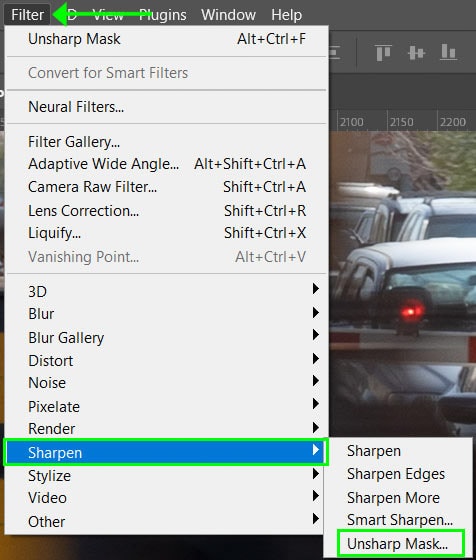
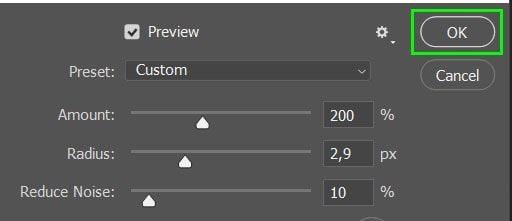
Once y'all select the menu item, the Unsharp Mask dialogue box will appear.

Firstly in the preview box where you lot tin can see your image, drag it around to focus on the part of your image where you lot will all-time see the sharpening effect. You can also click on an area of your image when the box icon appears to view that area in the preview box. The preview box is helpful if you haven't zoomed into your image.

And then, bank check the box adjacent to Preview to see the changes on your image every bit you suit the sliders. To meet the before and after on the image, yous can toggle between turning the preview on and off. Once clicking the box, you can as well press P to toggle between on and off.

Now, yous can suit the sliders at the bottom while seeing the changes in your image. The sliders work as follows:
The Amount slider determines the level of contrast added to the edges in the image. Essentially this lightens the low-cal side of an border and darkens the dark side.
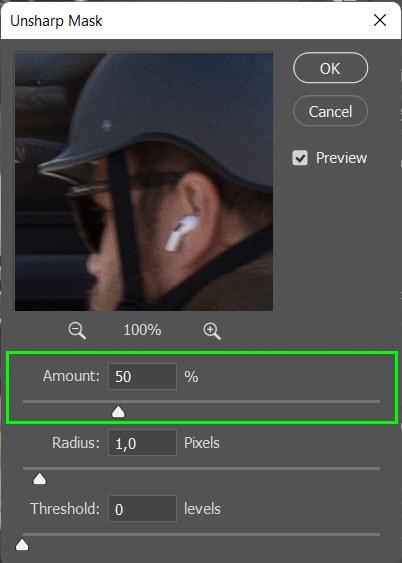
If you increase the amount likewise much, the light areas volition turn completely white, and the darker areas will become black, creating an over-sharpened image.

Setting the Amount will depend on how sharp your image is already, the size, and whether the paradigm is for print or spider web. However, here is a rough guide for choosing the amount (although it is somewhat subjective).
Web: When editing an prototype for depression-resolution utilize, such equally online purposes, an Amount value between l% and 80% will exist enough.
Impress: If you are printing the image in loftier resolution, it'south best to increment the Amount to somewhere between 140% and 200%.
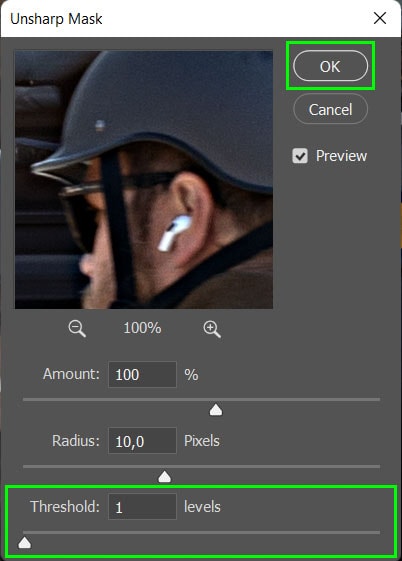
I will prepare this image to 100% to demonstrate the upshot.

Next, the Radius slider affects the thickness of the edges. The thickness is how many pixels extending from the edges Photoshop should include in the sharpening Amount that you ready previously. Currently, the Radius is ready to one, which ways that the sharpening upshot is applied to i pixel on the night side and 1 pixel on the light side.
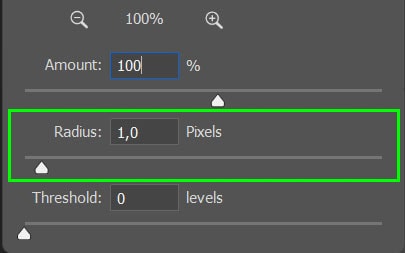
Increasing the Radius value will extend the number of afflicted pixels outwards from the edges. Hither, we can see what happens when we increase the Radius from 1 to twenty.
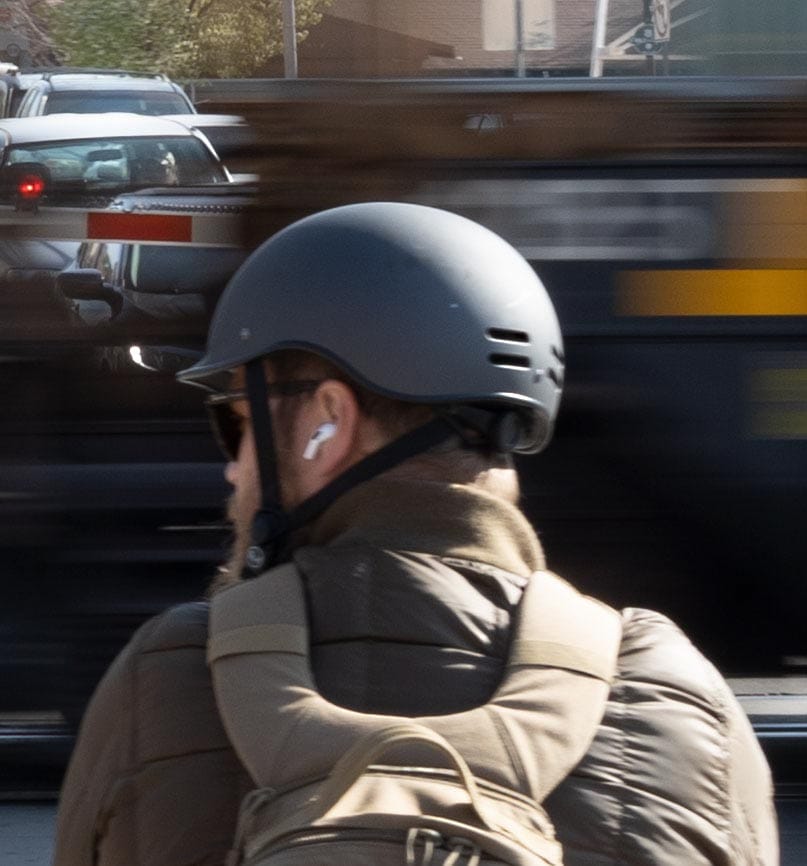
The image on the correct looks much darker as the increased contrast is applied to more areas of the image. Adding as well large of a radius will create an unrealistic outcome on the paradigm, and halos will begin forming.
When setting the Radius value, y'all should expect for an amount earlier any halo furnishings start actualization on the epitome. Again the guidelines here volition depend on whether you are using the paradigm for spider web or print.
- Spider web: Set the Radius between 1 to 3 pixels.
- Impress: Prepare the Radius between 0.5 and 0.nine pixels.
In this case, I will set the Radius at 10 pixels for demonstration purposes.

Lastly, the Threshold value determines how much to limit the sharpening of the paradigm since the Unsharp Mask function doesn't observe the edges equally intuitively as other sharpening methods. When the Threshold value is set at 0, the process volition sharpen all the pixels in the image. Increasing this value will limit how much of the photo is sharpened.
The Threshold determines how much contrast there should exist between pixels to consider them an "edge." I would suggest refraining from setting this higher up 10, and in this case, I will set up information technology at 1 to ensure the sharpening upshot is applied to most of the paradigm.
Once you take adjusted the sliders, select OK to apply the sharpening consequence to the image.
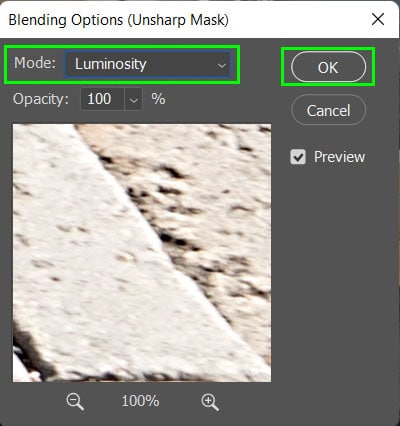
When using the Unsharp Mask, the effulgence and color of the pixels in the epitome are affected. This may cause oversaturation and unlike colors appearing in the epitome when they shouldn't.
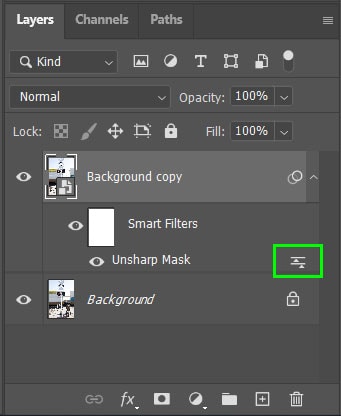
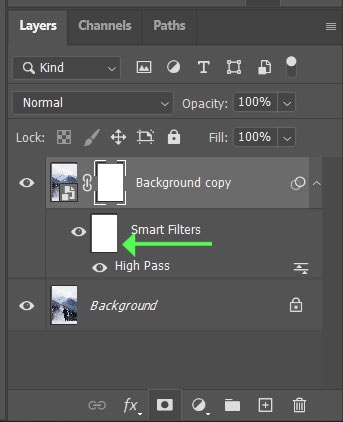
To ready this, double click on the filter icon next to the Unsharp Mask filter that appears below your image layer.
Select Luminosity from the driblet-down bill of fare next to Way and click OK.
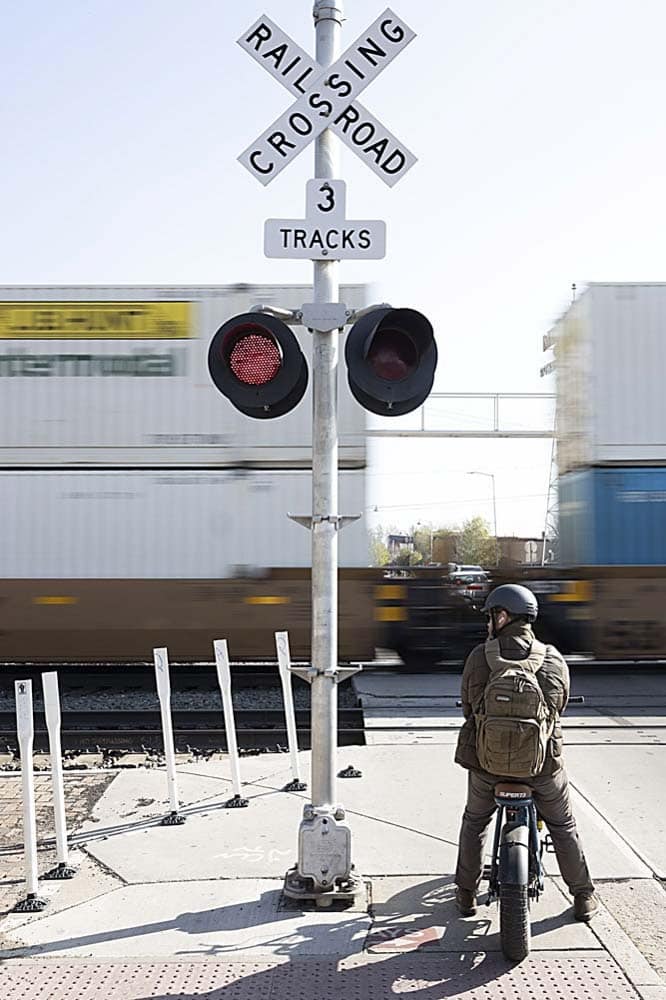
Now, when you lot zoom out of your image by pressing Control + 0 (Win) or Command + 0 (Mac), you will find the image is much sharper than before
2. Using The High Pass Filter
Using the Loftier Pass Filter method works by detecting edges in the paradigm and highlighting these edges.
To get-go, open your prototype, right-click or control + click on the groundwork layer, and select Catechumen to Smart Object. Converting the image to a smart object will permit y'all to edit non-destructively on the layer.
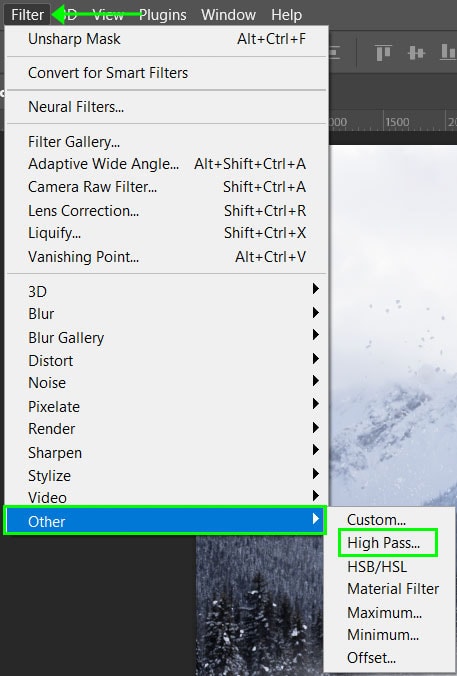
Next, navigate to Filter > Other > Loftier Pass to add the filter to the Smart Object layer.
Once you lot add the filter, the High Laissez passer dialogue box will open, and the prototype volition turn gray while highlighting the detected edges in the image.

Click and drag the image in the preview window to see the expanse of the image you would similar to focus on, and make sure to check the box next to Preview to see the live changes on the prototype.
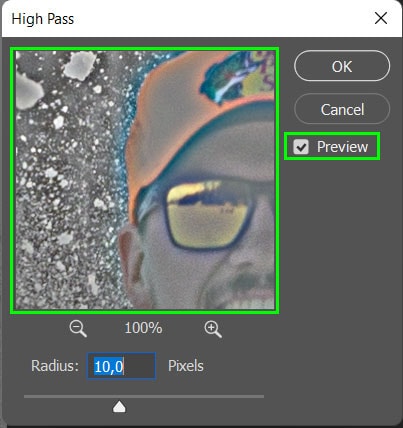
Next, adjust the Radius slider to make up one's mind how far beyond the detected edges the sharpening upshot should be applied. Setting the radius to ane pixel will extend the impact past 1 pixel on the lite side of the edge and 1 pixel on the left side of the edge.
If y'all slide the Radius down to 0,1 — the lowest value — you will notice that the image becomes completely grey. While increasing the slider to one thousand pixels — the highest value — will brand the image a lot more visible.

However, the point is not to see the image simply to see the subject contoured. The right balance is around ten pixels for demonstration purposes for this paradigm, although more often than not, a value betwixt ii and 6 pixels works well. One time the pixels are selected, press OK to apply the filter.

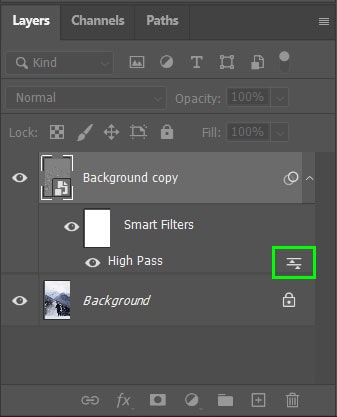
Now, y'all need to change the blend mode to alloy the loftier pass filter into the image. To change the alloy manner, double-click on the filters icon adjacent to the High pass filter layer.
Select the drop-downwards menu adjacent to Mode when the dialogue box opens, and select the suitable Alloy Mode for your image.
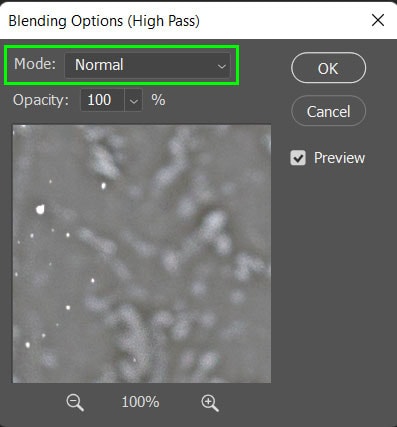
The best Modes to use in this example are:
- Soft Light for a subtle sharpening result with low contrast
- Overlay to produce a high contrast effect
- Difficult Low-cal for a bold sharpening effect
- Linear Light for the boldest sharpening result

Once yous have chosen the blend mode, hit Ok, and the image is sharper.


Equally I take gear up the Radius also loftier here for demonstration purposes, I tin can speedily go back and reduce this for a more natural sharpening issue. I double-click on the High pass filter layer in the Layers console and re-adjust the Radius.

I at present have a more subtle sharpen effect on the prototype.


three. Using Photographic camera Raw
When working with Raw files, you can rapidly sharpen the image in the Camera RAW window. This will add the sharpening outcome to the image earlier you lot open up it in the workspace and sharpen the luminosity — not the color — of the entire paradigm.
It's perfectly okay to sharpen the image in Camera RAW if you won't be editing the paradigm much in Photoshop. However, if y'all yet need to edit the prototype extensively, save the sharpening for last using one of the other methods.
To get-go, open up your RAW image in Photoshop, and the Camera Raw window will open automatically. Apply any edits using the console on the side until you are set up to open the image in Photoshop or relieve the paradigm. If you are working with a JPEG, select the image layer and get to Filter > Camera Raw Filter to access this window.

Now to begin sharpening the image, zoom in by pressing Control + + (Win) or Command + + (Mac). And then open the Item tab in the right-hand console.

One time the Item tab is open, click on the arrow next to Sharpening to access the various Sharpen sliders.

Adjust the sliders to achieve the desired sharpening issue for your image. The sliders bear on the sharpening as follows:
Sharpening: This slider works like to the Unsharp Mask past sharpening pixels that are assumed to exist edges based on the deviation in the surrounding pixels. Camera Raw automatically calculates the Threshold level based on the camera model, exposure, and ISO.
Radius: Sets how many pixels are sharpened around the supposed edges in the paradigm. Setting this as well high will create an unnatural upshot on the image.
Detail: Alters how much loftier-frequency areas are sharpened and to what extent the edges are emphasized. Lower values reduce blurring, and college values highlight textures in the prototype.

Masking: This slider affects the edge mask. A depression value will add together the sharpening to near of the image, while a higher value will only sharpen the areas shut to distinct edges. Hold in Alt (Win) or Choice (Mac) while adjusting the slider to view the mask on the epitome.

Once yous take adapted the sliders, you can proceed to open your epitome in Photoshop past clicking Open or save it by clicking Done.

Yous will now accept a sharpened prototype.

four. Using Smart Acuminate
The Smart Sharpen method tin can discover edges, unlike the Unsharp Mask, and this allows the filter to sharpen edges while ignoring noise in the image. This filter likewise has more than settings for yous to arrange to give y'all more than control over how the prototype is affected.
To use Smart Sharpen on an image, open it upward and convert it to a Smart Object by correct-clicking or command-clicking on the layer and selecting Convert to Smart Object.
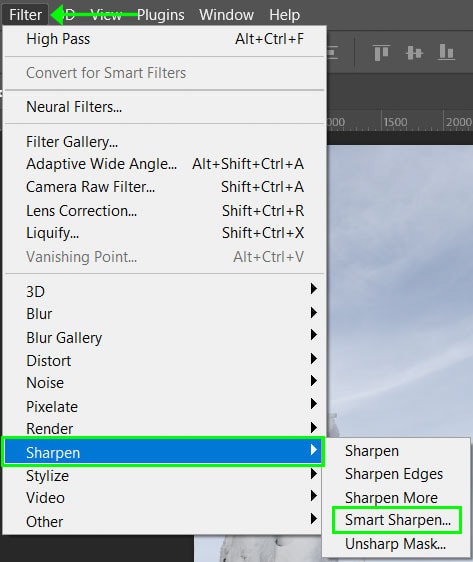
With the Smart Object layer selected, head to Filter > Acuminate > Smart Sharpen.
When the Smart Sharpen dialogue box opens, adjust the preview box and check the box next to Preview as in the previous examples. Y'all will observe Photoshop has automatically sharpened the image.
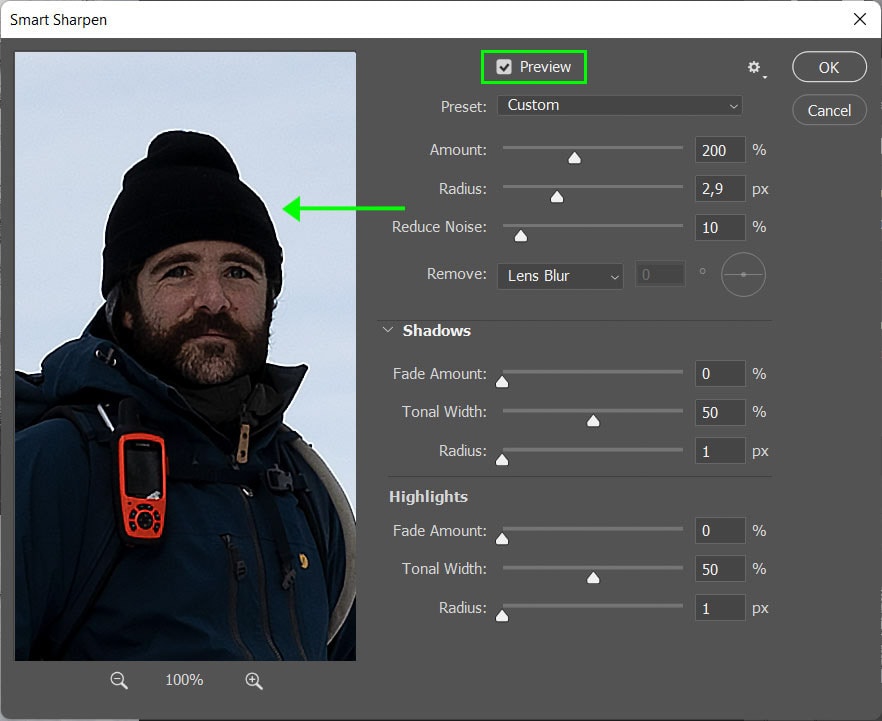
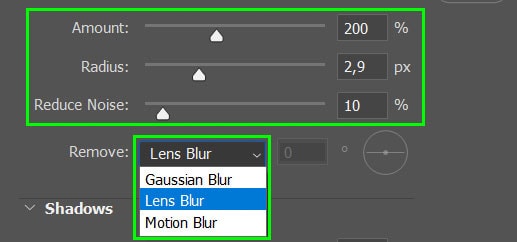
At present you tin adjust the various sliders as desired for your image. The Corporeality and Radius sliders piece of work the same as in Unsharp Mask, although this filter accurately detects the edges in the epitome.
The Reduce Noise slider is an additional characteristic that allows you to reduce the amount of noise in the epitome. Don't decrease the noise too much, or the image will soften likewise much.
Y'all can also click the drop-down card next to Remove to select what areas are sharpened in the image. These piece of work every bit follows:
- Lens Blur: is the general setting that detects the edges in the image
- Gaussian Blur: works like the Unsharp Mask without whatsoever edge detection
- Move Blur: is best used for blurred areas caused by camera shake
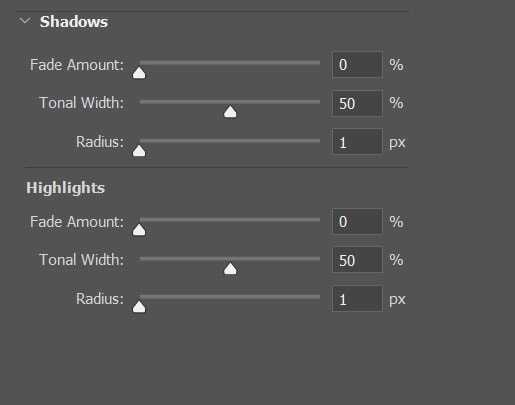
The Shadows and Highlights settings are at the bottom of the window. These settings allow you to restore details in these areas of the image if they are affected past the sharpening. If this tab isn't open, click the arrow next to Shadows.

Both the shadow and highlight sections have the same settings, which piece of work every bit follows:
Fade Corporeality: Adjust how much the sharpening fades in the shadows or highlights. Increasing the value decreases how much sharpening is practical to those areas.
Tonal Width: This slider sets the range of brightness levels within the fade amount set up above. In nigh cases, this should remain at l%.
Radius: The Radius slider works equally the other radius slider (in the unsharp mask method) to determine how many pixels are affected by the sharpening. This is based on the fade amount and determines whether pixels autumn into the tonal range specified in the shadows or highlights.
Once you accept adjusted the settings for your image, you can salvage them every bit a preset to apply on other images. To relieve the settings as a preset, click the drop-down card adjacent to Preset and select Relieve Preset.
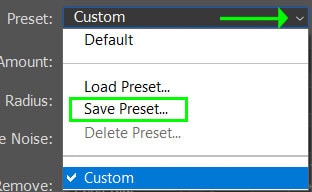
In one case you have saved the Preset, you tin easily find it past loading information technology adjacent time you need to use it. Once y'all finish adjusting and saving the settings, select OK to utilize the filter to your image.
Your image will now be sharper than before.

How To Apply Selective Sharpening In Photoshop
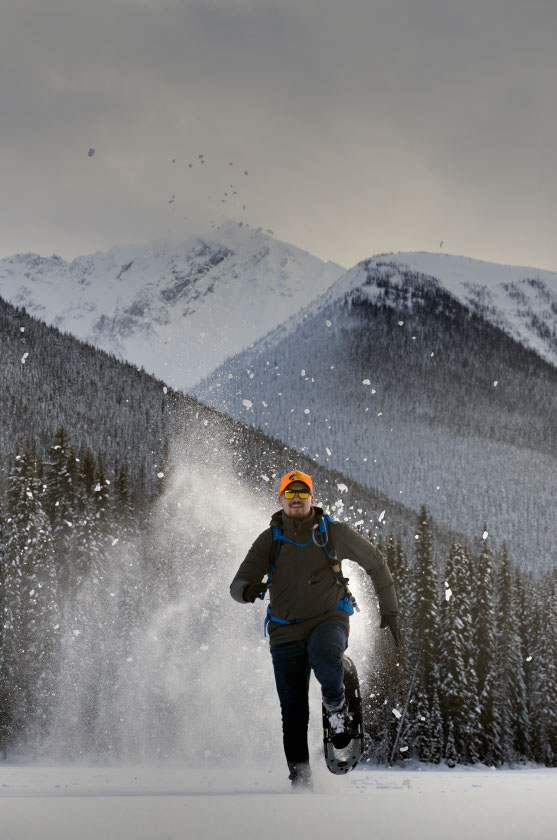
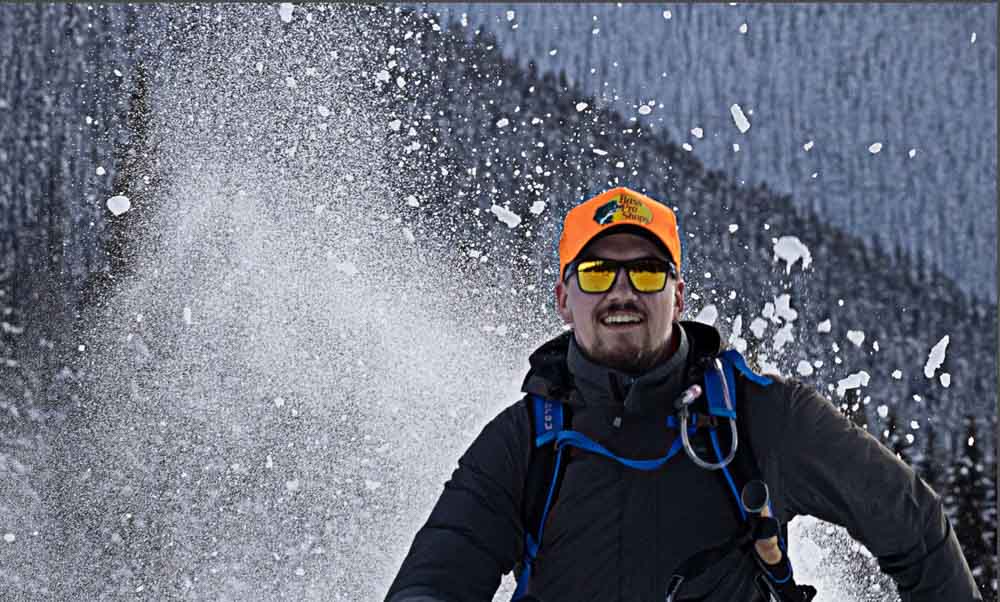
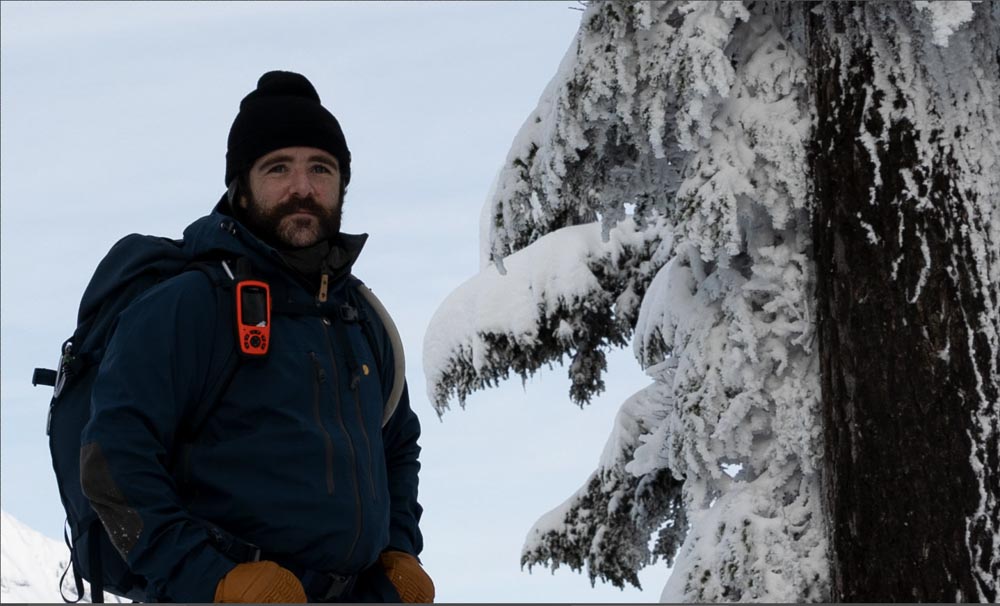
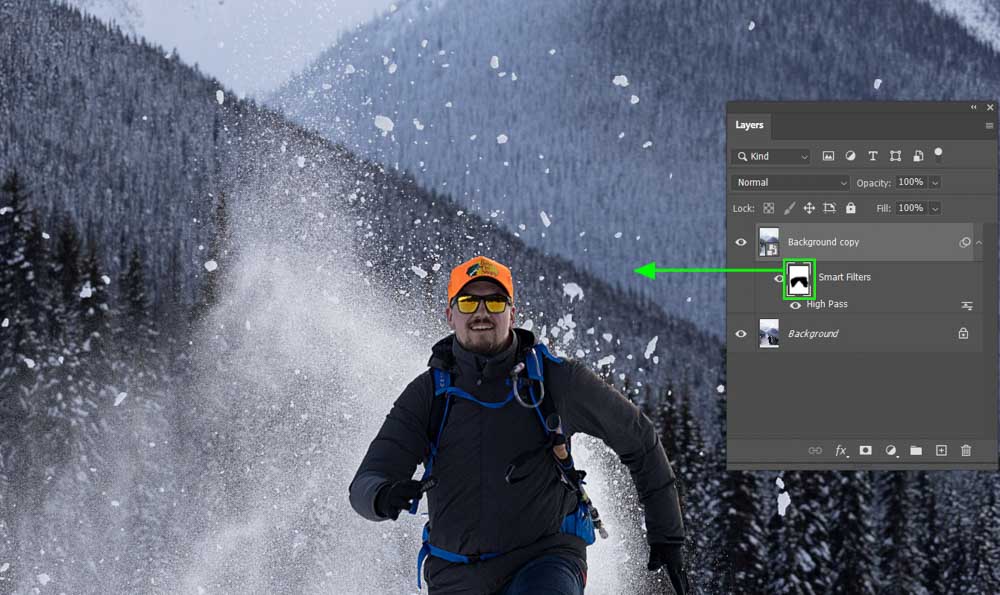
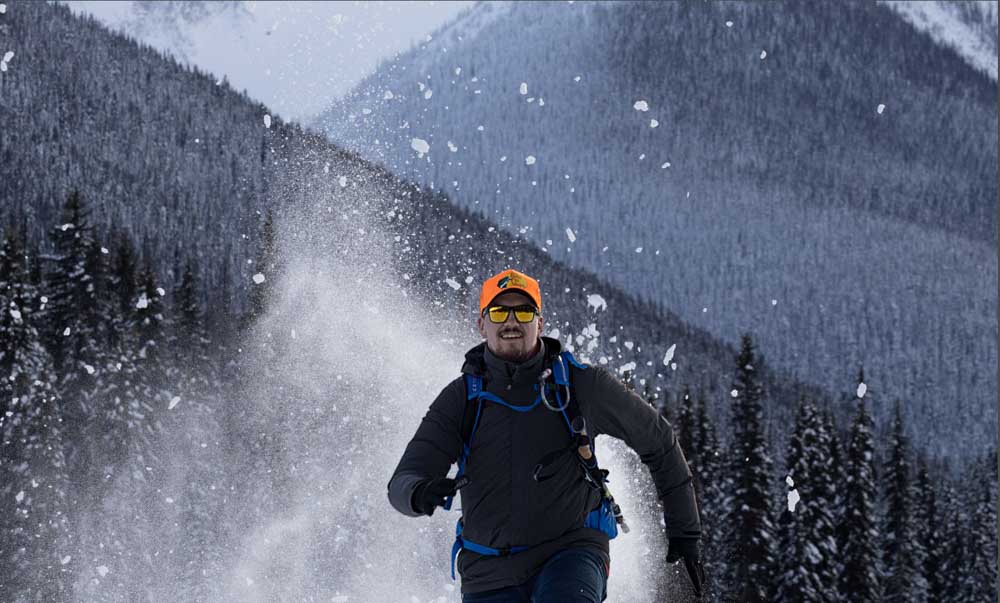
On sure images, you may want to only apply the sharpening effect to some regions of the prototype. Using the paradigm sharpened with the High Pass filter as an example, I desire to only acuminate the man in the image and go out the bits of snowfall effectually him slightly blurred.
This method works with any blazon of sharpening effect, except for Camera Raw, meaning you can use any of the other examples.
Once you lot take sharpened the image with your preferred method, select the layer mask of the Smart Filter. The white in the thumbnail displays everything that is afflicted past the filter.
Now, select the Brush Tool (B) and ensure you prepare the foreground colour to Black.
Next, yous tin can merely brush over the areas where y'all want to remove the smart filter. You volition notice blackness areas on the layer mask, which show the areas where the filter is removed.
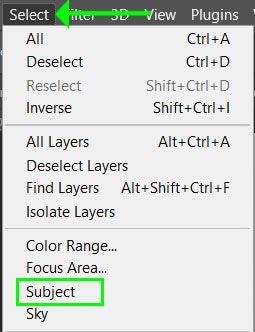
There is an easier fashion if y'all don't desire to remove areas with the brush and instead remove the sharpen filter from everything simply the field of study. Navigate to Select > Subject, then click Command + Shift + I (Win) or Command + Shift + I (Mac) to select everything around the subject area.
Then, with the Smart Filter layer mask selected press Alt + Delete (Win) or Option + Delete (Mac). This control volition automatically remove the filter from everything within the selection, leaving only the subject with the acuminate filter applied, equally you will see in the layer mask.

Your paradigm will now simply accept the sharpened areas that you have chosen while the rest of the image is as it was previously.
The method of sharpening you use ultimately depends on the workflow you lot prefer. In my instance, I tend to use Camera Raw or the Unsharp Mask for my sharpening adjustments. This is simply considering I like the options these methods provide in terms of sharpening control. So be sure to endeavour all four of these sharpening techniques in Photoshop to see which one y'all prefer!
Trying To Learn Photoshop?
Source: https://www.bwillcreative.com/how-to-sharpen-images-in-photoshop/
Posted by: stoutsard1967.blogspot.com
0 Response to "How To Use A Mask On A Video In Photoshop"
Post a Comment